
NATURAL DYEING WITH GOLDEN ROD (Solidago)

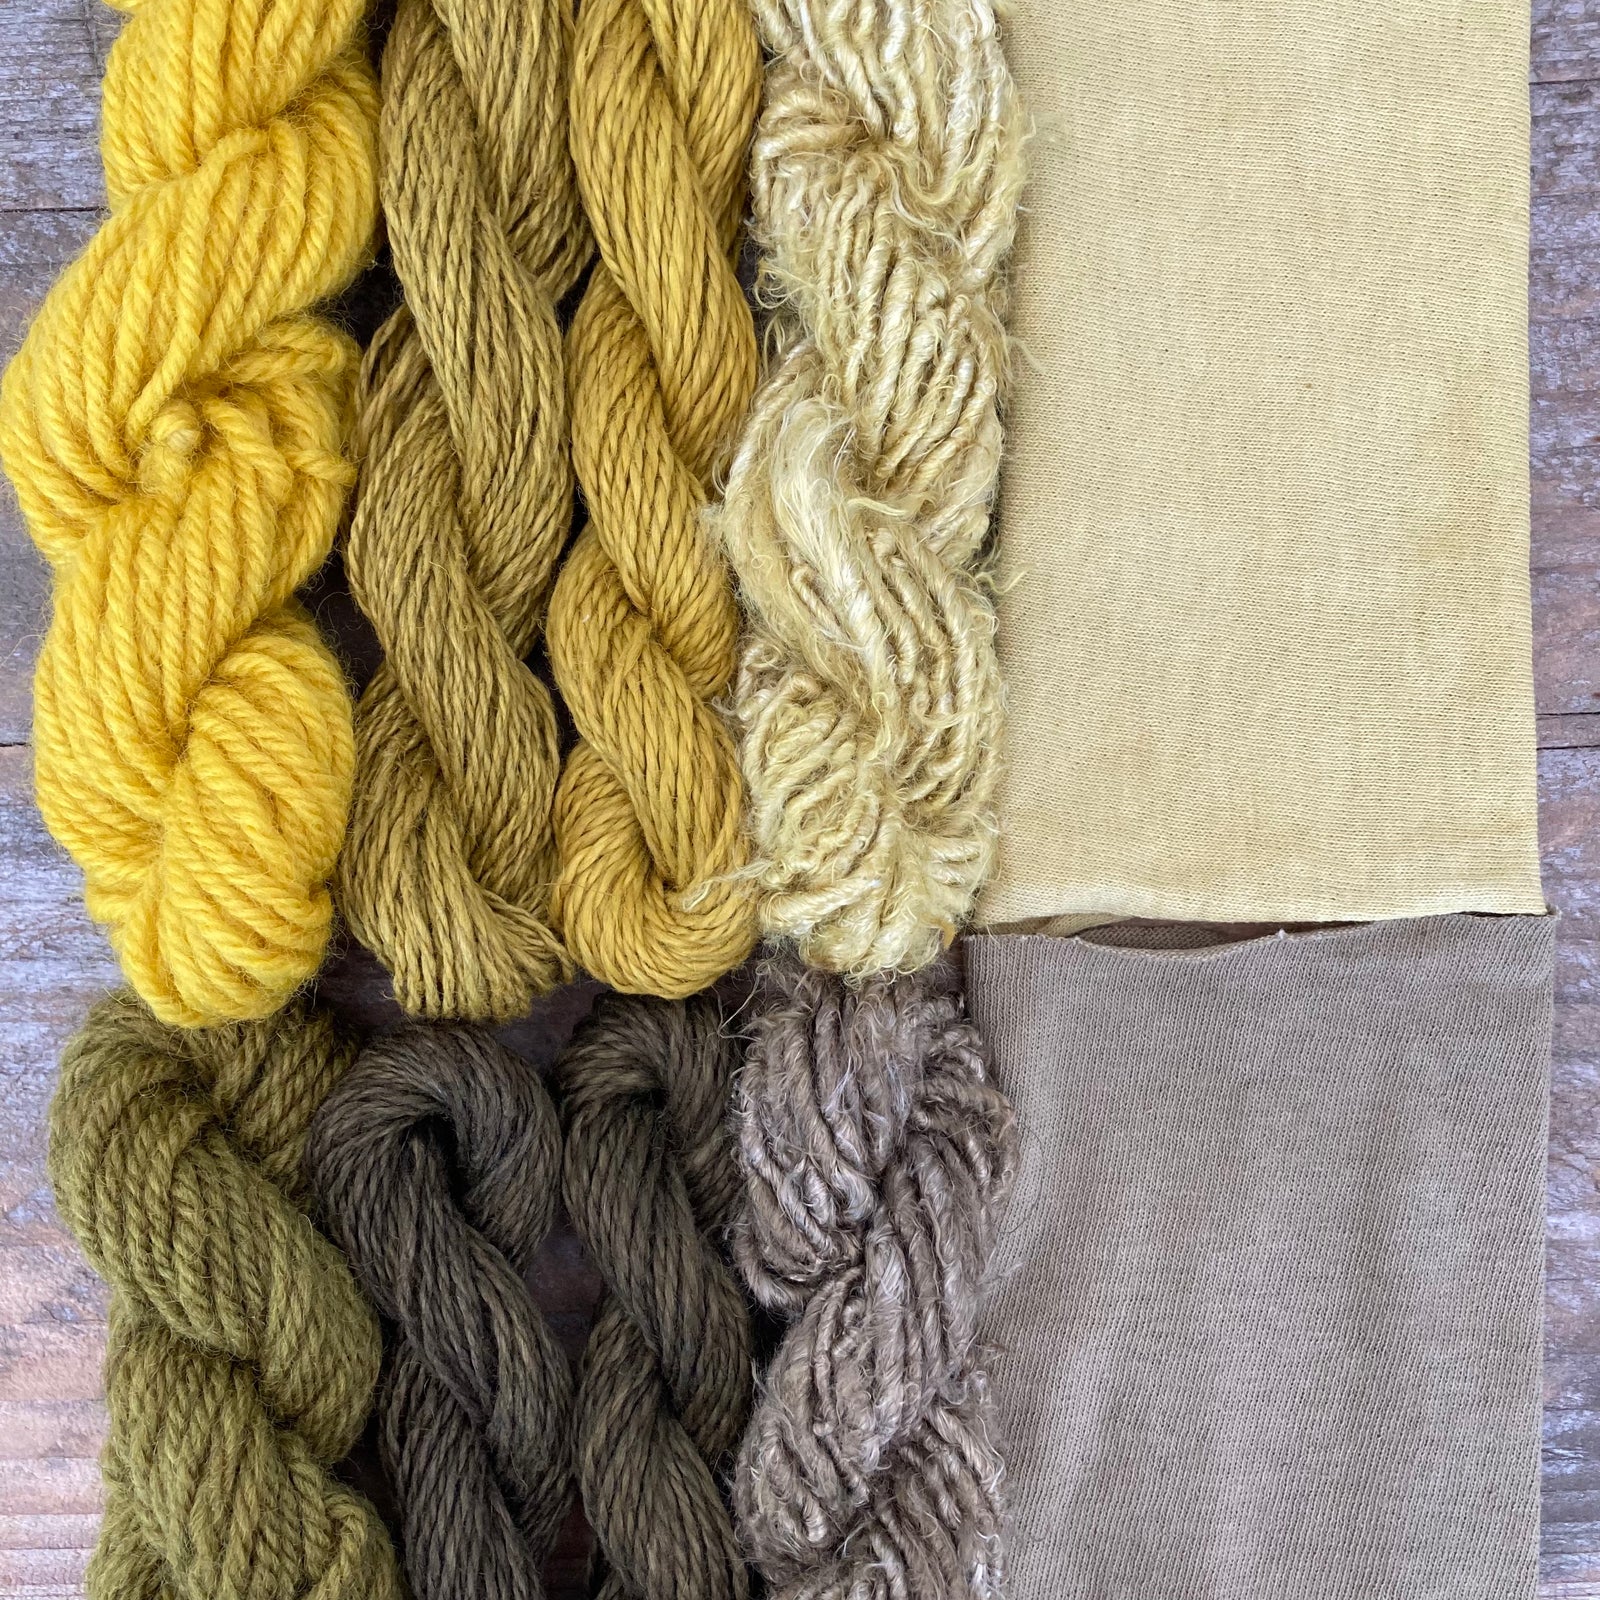
Final dye results

Goldenrod growing wild
Goldenrod is one of over a hundred species in the family Asteraceae, most of which are native to North America but many of which are now widely grown, and can be invasive. It’s an impressive herbaceous perennial, growing to over a meter in height and forming clusters of waving, bright yellow, pyramidal flowers. These sweet-scented blooms are a late-summer food source and a magnet for pollinators such as bees and wasps, butterflies and months.
The name ‘solidago’ comes from the latin ‘solido’, meaning ‘to make whole’; a reference to its healing properties. It has a long history in traditional medicine as a diuretic and anti-inflammatory and a tincture of Goldenrod is still prescribed by alternative practitioners for alleviating a range of symptoms.
 Foraged goldenrod
After gathering plant material for the dye bath it’s important to leave it outside for a couple of hours, to give the insect life a chance to move on. Flying insects depart swiftly, but creepy crawlies are sometimes reluctant to leave. Giving the dyestuff a bit of a shake usually works!

Raw fibres
For this natural dyeing project I’m using a skein of naturally white Bluefaced Leicester wool. Wool is an animal (protein) fibre.
I’m also using four plant (cellulose) fibres These are: a skein of natural linen, a skein of bleached linen, a skein of bleached banana yarn and a square of bleached cotton.

Weighing the dyestuff
For most natural dyeing projects, equal weights of fibre and dyestuff will give a good colour, ie 100% WOF (weight of fibre). As my samples weigh approximately 100g, I’m using 100g of Goldenrod flower tops.

Steeping the dyestuff
To extract the most colour from your dyestuff it’s a good idea to pour kettle-hot water over the plant material, to soften it up, and then to leave it to cool and to steep overnight.
Some dyes are more water-soluble than others, and you’ll sometimes find that just steeping the dyestuff overnight imparts a good colour to the water, and the dyestuff can be strained without further heating.

Heating the dyestuff
For most dyestuffs, and in the case of this Goldenrod, it’s necessary to heat the dyestuff bath to 80C and hold it at this temperature for an hour. A thermometer is helpful, but if you haven’t got one just keep an eye on the pot and reduce the heat as soon as the first small bubbles begin to rise to the surface.
Then leave the dyestuff to cool in the pot before being strained.
Overheating natural dyes tends to dull the colours. I use an electric hob and remove the dye pot to a heatproof mat from time to time to regulate the temperature. A gas hob is easier to control.
Steeping the heated dyestuff overnight, or even several days, will usually result in stronger colours but also risks losing some of the original brightness of tone.
 Straining the dyestuff
Once the dyestuff has cooled the solution can be strained into a clean bowl using a sieve, lined with a muslin cloth. Give the muslin a good squeeze to extract as much colour as possible. These Goldenrod flowers then went straight onto the compost heap, but in the case of some dyestuffs (eg Correopsis) there is often enough colour left to be worth extracting for a second dye bath.
Be sure to rinse out the dye pot before returning the strained solution, to ensure that you have a good clean, clear dye bath without any bits that may get caught up In the fibres.

Adding fibres to the dye bath
These four fibre samples had all been prepared (scoured and mordanted) as necessary and wetted out (soaked thoroughly) before dyeing. (see elkatextiles.co.uk)
I would normally recommend dyeing wool separately as it’s more fragile than most plant fibres and needs gentle handling to avoid matting, but for this project I entered all four fibres into the dye bath together.
Make sure there’s enough liquid in the dye bath to allow the fibres to move freely. You can top up with more water if necessary and this will not dilute the dye bath. The fibres will take up the available dye particles regardless of the amount of water.

Laying cotton swatch flat
It’s easier to get even dye results on yarns than it is on pieces of fabric, which tend to fold over on themselves. The folds and creases dye unevenly (see blog Natural Dyeing With Nettles) so when entering fabric into a dye bath try and minimize these. With larger pieces of fabric it will be necessary to keep working the piece around in the dye bath, and lifting it in and out to make sure the dye is reaching all surfaces evenly.
 Heating the fibres
Heat the dye bath to 80C and hold it at this temperature for about an hour. Then allow the fibres to cool in the dye bath. Again, as with the dyestuff, the fibres can be left overnight or longer to create stronger colours, but sometimes brighter tones are achieved by removing the fibres sooner. Keep an eye on the pot to ‘capture’ the right moment, allowing for the fact that fibres will be several shades lighter once they’ve been washed and dried.

Removing fibres from the dye bath and hanging to dry
Remove the fibres from the dye bath and hang them to dry without washing them at this stage. This allows to fibres to absorb as much of the dye as possible. Washing them immediately risks losing some of the precious dye.

Washing fibres
Once dry, wash the fibres in warm water with a little pH neutral detergent, taking care not to agitate any wool you may be dyeing. Wool is fragile when wet and easily prone to matting.

Final rinse
Continue rinsing the fibres until the water runs clear – or almost. Cold water is sufficient for this. Then hang your fibres to dry away from harsh light.

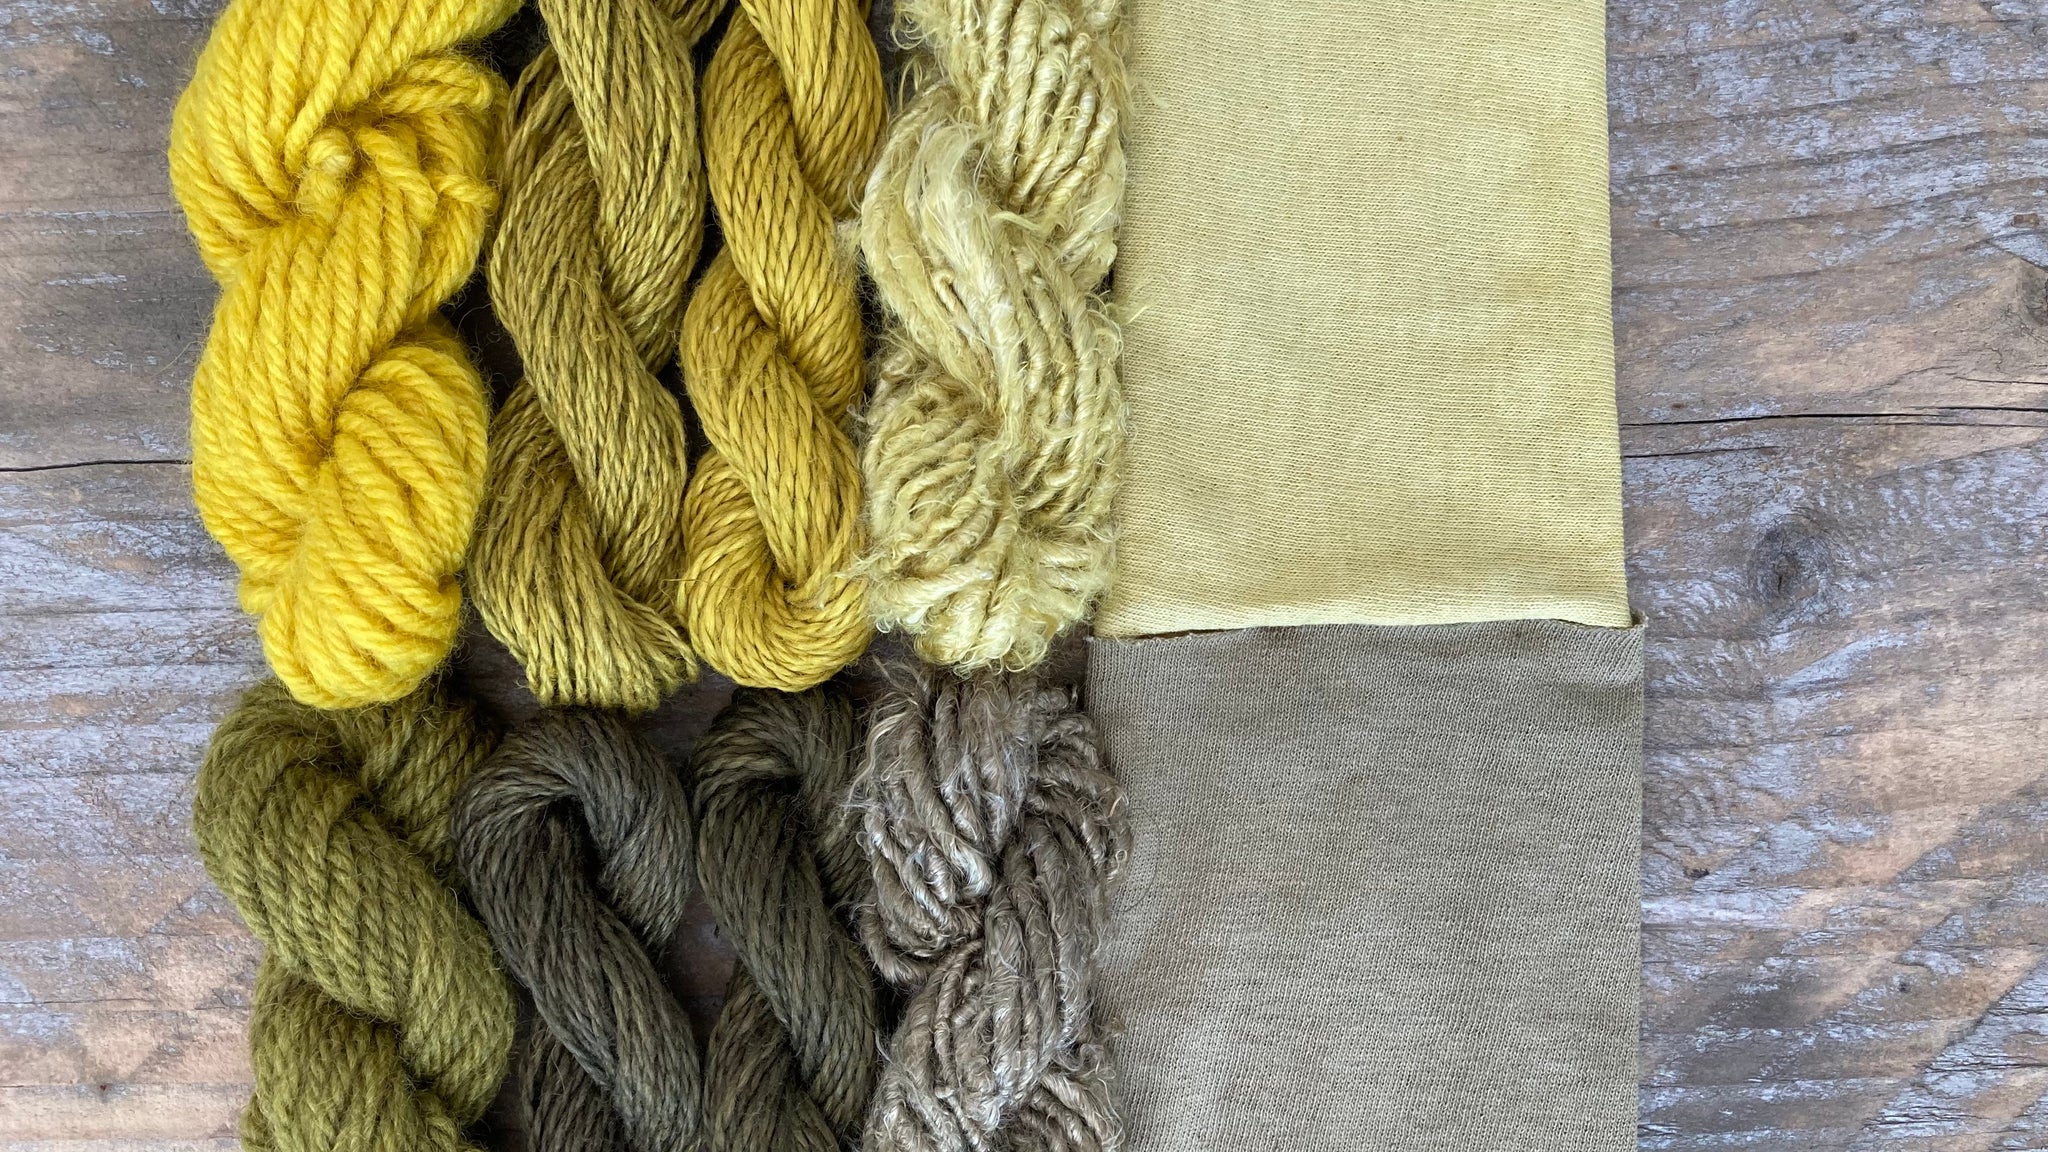
Fibres washed, dried and skeined
It’s always interesting to see how different fibres take up different natural dyes, and just how wide-ranging the colours can be.
The variation between the natural linen and the bleached linen fibre demonstrates the degree to which the starting colour of a fibre affects the final outcome - the wool giving the most dramatic result.
MODIFYING: EXTENDING THE COLOUR RANGE OF A DYE BATH

The four modifiers
There are four ‘modifiers’ that can be used to extend the colour range of a dye bath:
Iron, copper, vinegar or lemon juice (acidic) and wood ash water or ammonia (alkali). Iron is the one most commonly used by natural dyers and the one I’m using here.
It’s best to add your fibres to a modifying bath immediately after removing them from the dye bath.
I dyed two lots of samples so I could ‘modify’ one lot with iron, which will always deepen or ‘sadden’ the tone of natural dyes.
Iron stains everything so you need separate pots and utensils to create an iron modifying bath. You can make your own iron water (ferrous acetate) with a mixture of water, vinegar and some rusty pieces of metal (see our online course 'An Introduction to Natural Dyeing') or you can buy ferrous sulphate from craft suppliers, which I’m using here.

Weighing ferrous sulphate
To make an effective iron modifying bath you only need a pinch of ferrous sulphate, dissolved well in warm water, and added to enough water to allow the fibres to move freely. 1% WOF is a good gauge.

Iron bath
Iron can be damaging to fibres, particularly animal fibres such as wool, so don’t leave them in the iron bath for long. Modifying with iron improves the colourfast quality of natural dyes, and iron can also be used as a mordant, before dyeing.

Iron modified fibres hanging to dry
Fibres will change colour quickly in an iron modifying bath, so keep an eye on the process and remove the fibres as soon as you have the colour you want. They should then be rinsed well and hung to dry before the final wash.
As anticipated, the iron modifying bath has dramatically altered the dye colours; the bright yellow wool turning a rich olive green. While it’s hard to tell the difference between the two modified linen fibres the banana and cotton fibres have turned from pale yellows to soft browns.
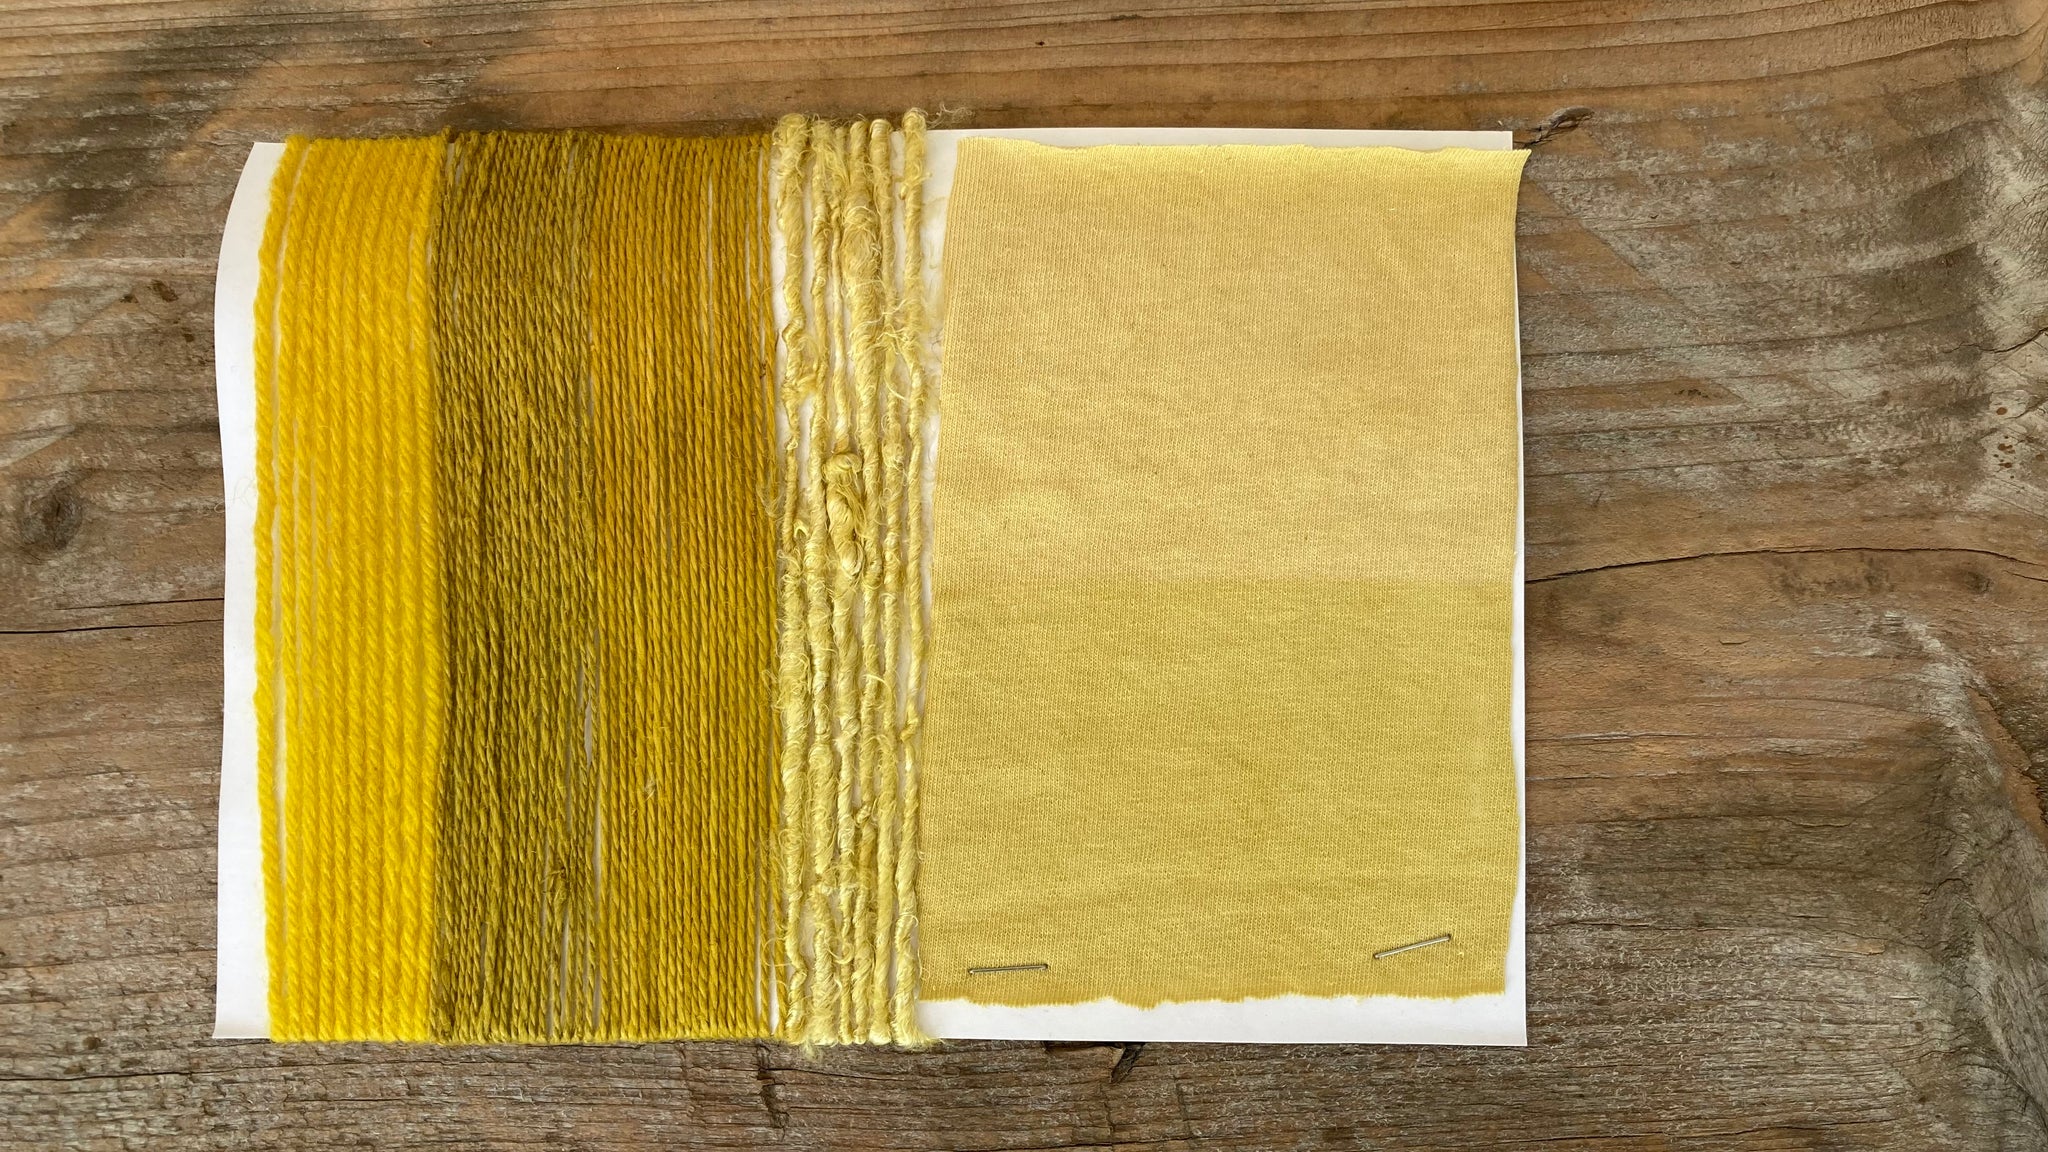
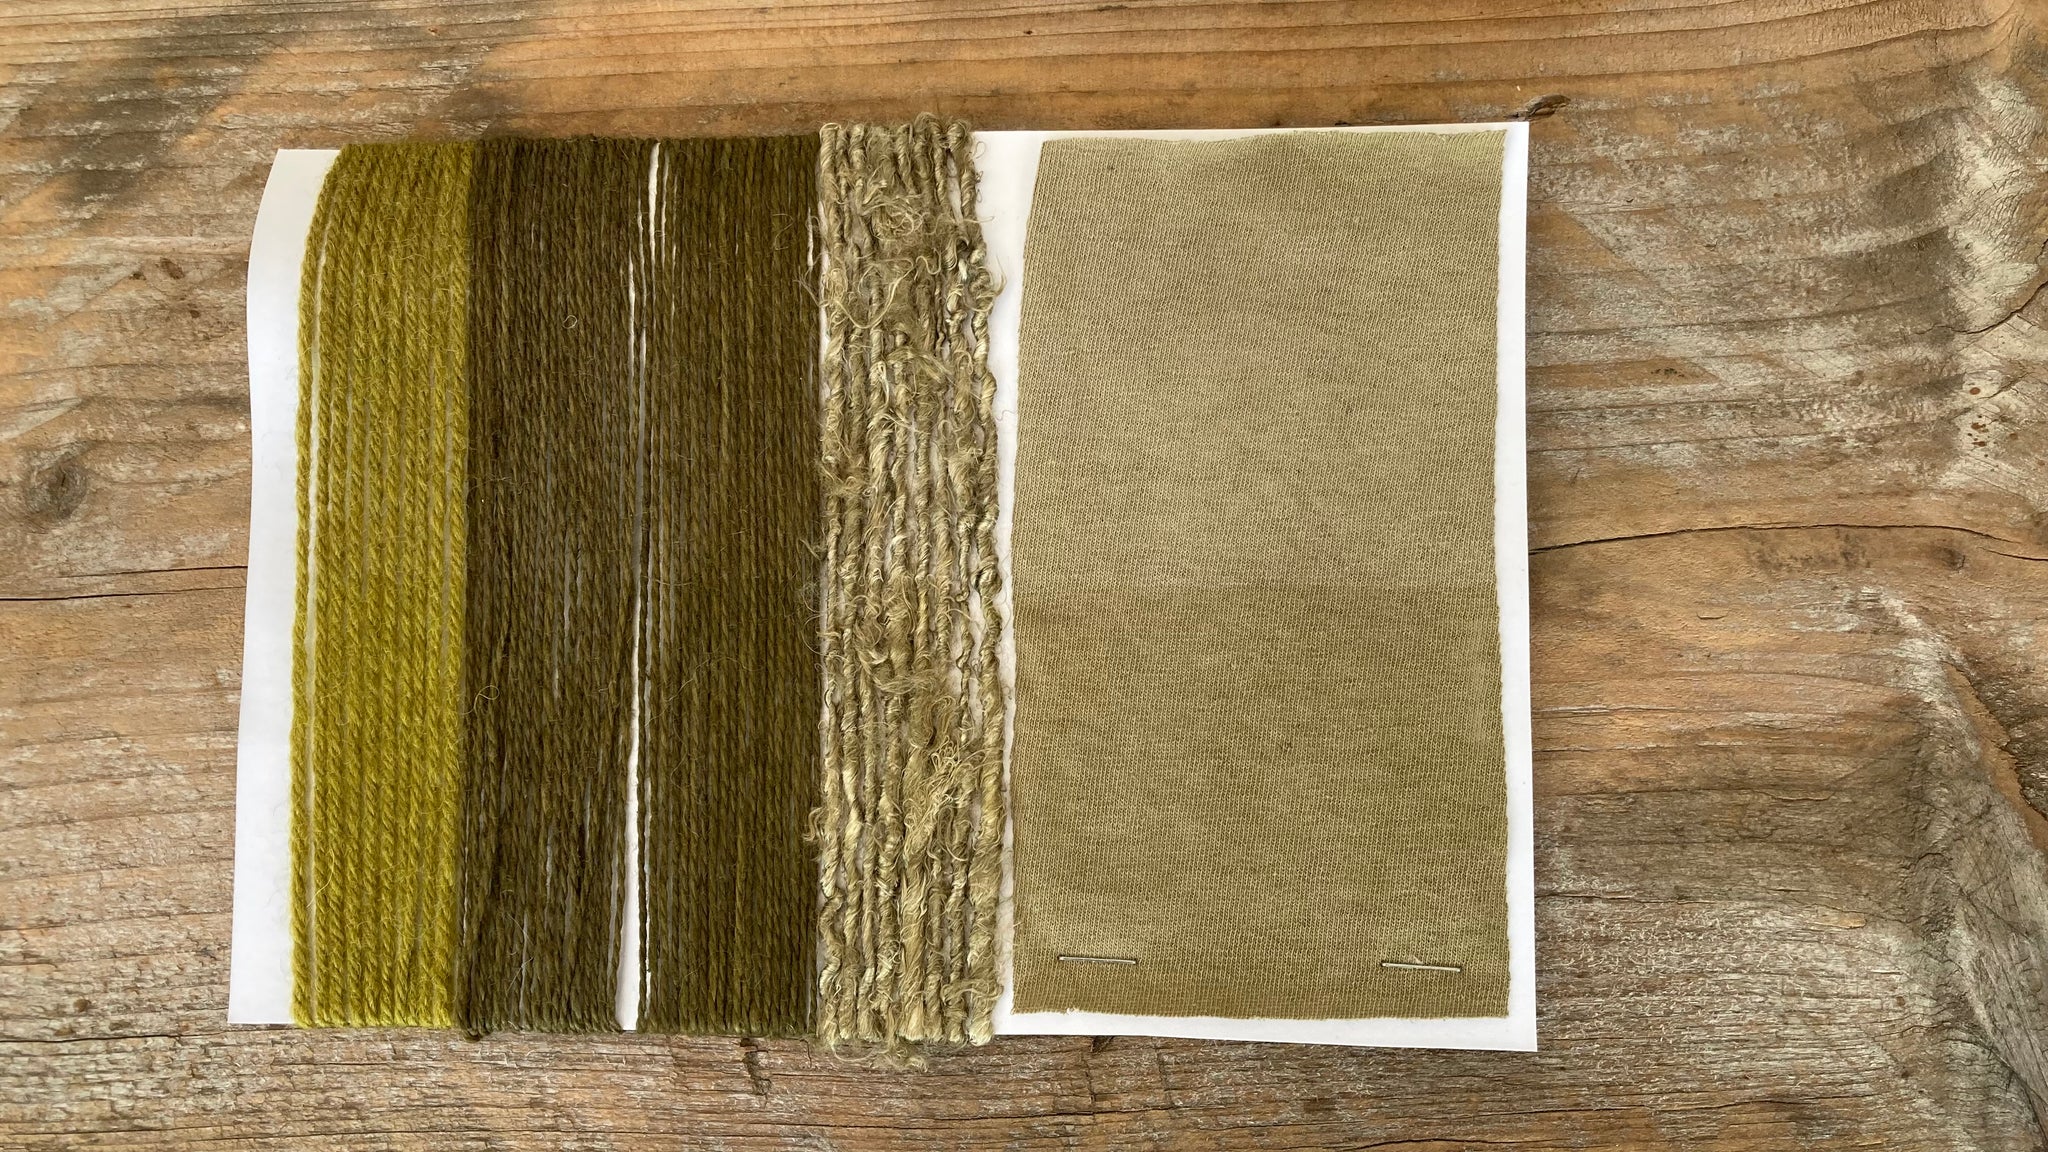
LIGHTFAST TESTING
These lighfast testers were left on a south-facing window sill for eight weeks, October and November. The bottom half of the card was covered while the top half was left exposed to the light. Apart from a slight line across the cotton sample there has been no visible loss of colour during this period. As someone who normally uses weld for a strong and reliable yellow, I would certainly use Goldenrod as an alternative. And I love all the soft, warm tones of the iron-modified samples.
References:
Jenny Dean (2010) Wild Colour Octopus Publishing Group
Boutrup and Ellis (2018) The Art and Science of Natural Dyes Schiffer Publishing Limited