
NATURALLY DYEING WITH DYER’S COREOPSIS (Coreopsis tinctoria)

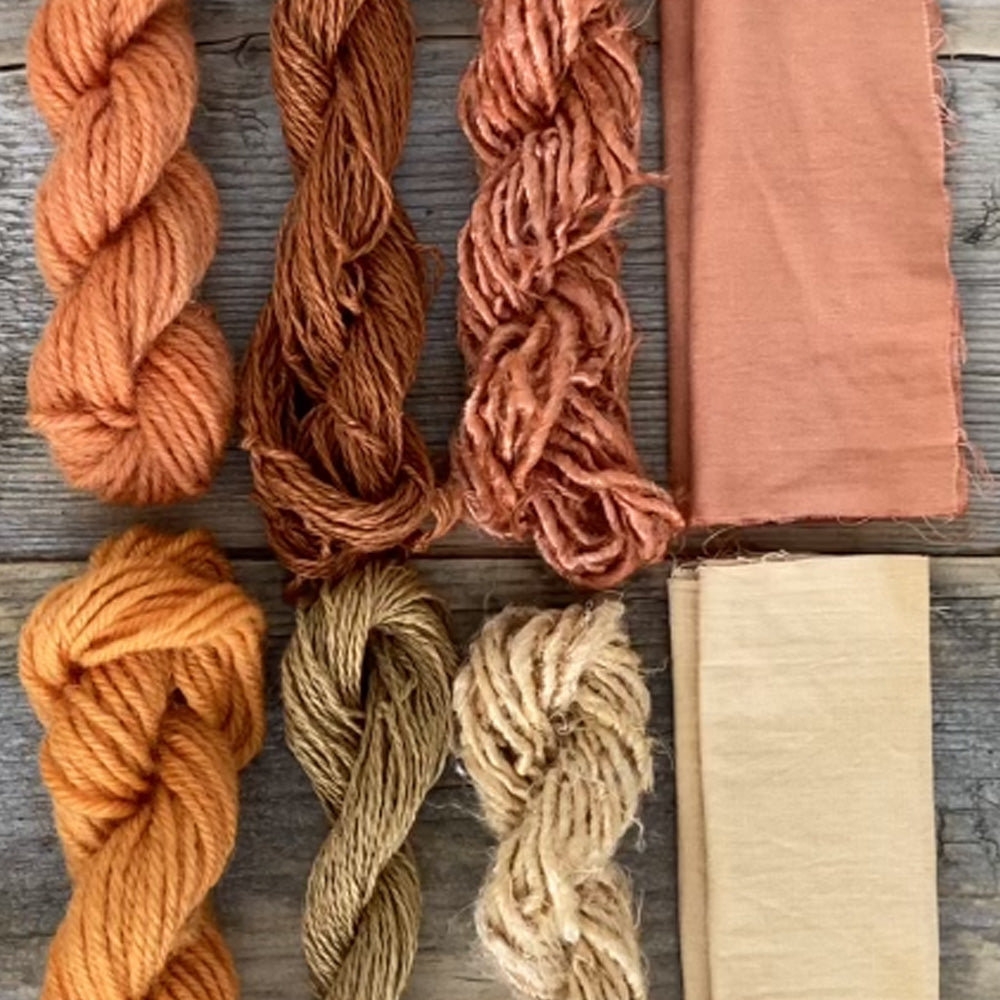
Image: Final dye results
Coreopsis tinctoria is one of over 75 species in the family Asteraceae. Originally native to the prairies of North America it is now cultivated world-wide and comes in a range of yellows and reds or, like Coreopsis tinctoria, yellow with red centres. As the word ‘tinctoria’ indicates this is a recognised dye plant and although historical reference to it is limited, it is known to have been used as a source of natural dye by the plains tribes of North America. It’s also thought to have been used by the early civilisations of Central and South America. Sometimes called ‘tickseed’, a reference to its insect-like seeds, the plant was reportedly used in bedding to ward off bedbugs.
Coreopsis tinctoria is an easily grown annual, that will add a cheerful splash of colour to the sunny corner of your dye garden. It flowers throughout the summer and early autumn and the hoverflies seem to love it. The flowers can be used fresh or dried for natural dyeing, and picking off the flower heads as they begin to fade will encourage more to grow. Once the flowering season is over the plant tops can also be used for dyeing, giving a further range colours.
Coreopsis tinctoria is rich in dyestuffs including luteolin (yellow) and morin (the orange component of fustic). They are highly water soluble so, following the advice of Susan Dye of Natures Rainbow, I simply poured kettle-hot water over the fresh flowers and left them to soak overnight before straining the dyestuff to create a clear dye bath – no further heating required.

Image: Fibres before dyeing
For this natural dyeing project I’m using (left to right) a skein of naturally white Bluefaced Leicester wool (an animal / protein fibre), skeins of linen and banana yarn, as well as a square of cotton fabric (plant / cellulose fibres).
These fibres were all mordanted before dyeing. (For detailed information on how to prepare both plant and animal fibres for dyeing see www.elkatextiles.co.uk)

Image: Weighing the dyestuff
I used 100% weight of fibre (WOF), meaning I used an equal weight of dyestuff and fibre. My fibre samples weighted just under 60g and the flower heads all came from Ellie’s dye garden.

Image: Steeping the dyestuff
I poured enough kettle-hot water over the flowers to make sure I would have a deep enough dye bath to allow the fibre samples to move freely. I then left the dyestuff to steep and cool overnight.

Image: Straining the dyestuff
The dyestuff was then strained through a muslin-lined sieve to create a clear dye bath, free of any bits that might get caught up in the fibres.

Image: Adding the fibres to the dye bath
Be sure to soak fibres well (wetting-out) before adding them to a dye bath. This allows to fibres to open up, making them more receptive to the dye. I always soak fibres at least overnight and, in the case of water-resistant wool, for a couple of nights. I would normally recommend dyeing wool separately as it’s more fragile than most plant fibres and needs gentle handling to avoid matting.
In this case all four fibres were entered together into the dye bath and left to steep, without heating, for 24 hours. Leaving fibres to steep for longer might result in stronger colours but, as we’ll see, this 100% WOF dye bath was pretty potent!
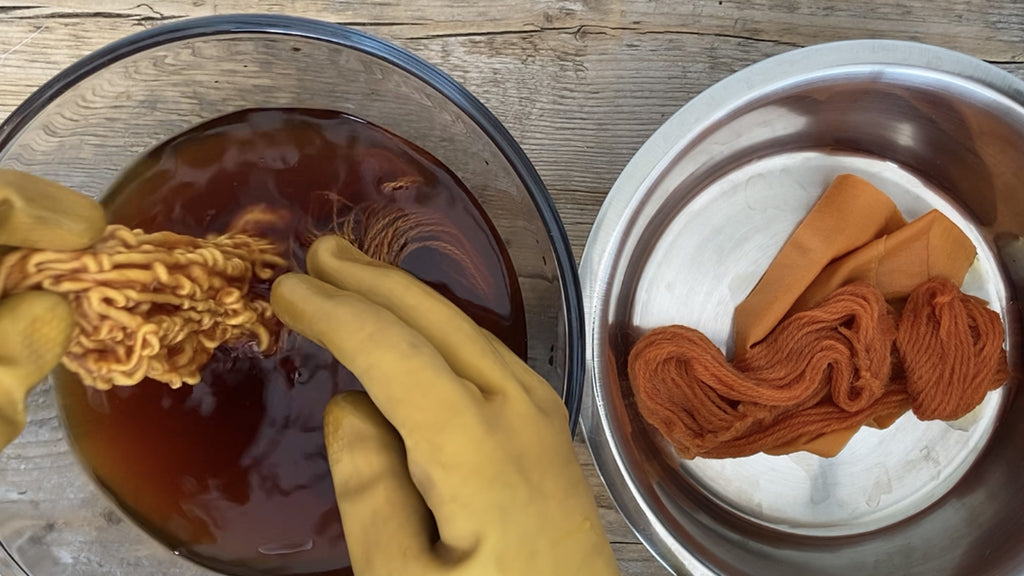
Image: Removing the fibres from the dye bath

Image: Hanging the fibres to dry
The next day remove the fibres from the dyebath and hang them to dry without washing. This gives the fibres the chance to retain as much of the dye as possible as they dry out. Washing them immediately risks losing too much of the precious dye.

Image: Fibres dry before washing
Bear in mind that fibres will always be several shades lighter once they dry, and allow for this when considering the weight of dyestuff to fibre – the all-important WOF. It’s also the case that there is a limit to how much dyestuff a fibre can absorb at any one time, so for bolder colours it’s worth considering re-mordanting and then over-dyeing.

Image: Washing the fibres
The final stage in the natural dyeing process is to wash the fibres well in warm water with a little pH neutral detergent. EcovertZero is a good option.

Image: First rinse

Image: Final rinse
Rinse the fibres in several changes of cold water until there is little or no dye colour left. Then hang them to finally dry.

Image: Fibres washed and dried
Comparing the colour of the fibres before and after washing, it seems that Coreopsis is relatively washfast.

Image: Fibres from 'exhaust' dye bath washed and dried
I always like to make the most of good dye bath so added a second batch of samples to this pre-used, ‘exhaust’ dye bath. I left them to steep in the cold dye bath for several days as I was busy with other things, and was very happy with the result.
TAKE AWAY:
It’s interesting to see that the difference in colour between the original and the ‘exhaust’ dye baths is much more pronounced on the plant fibres than the animal. The ‘exhaust’ plant fibres are not just paler but more yellow in tone, while the wool has retained its orange glow.
NB: Wool is unlike any other fibre in that it comprises an outer layer of scales and an inner cortex. The outer scales open when the wool fibre swells in water, as would have been the case with these wool samples, which were well wetted-out before mordanting and dyeing. However, in order to swell the inner cortex it’s necessary to heat the dye bath and because this coreopsis dye bath was not heated, the wool would not have fully expanded to allow the dye to penetrate the inner cortex. This means that these wool samples will not have taken up as much dye as they would have done in a heated dye bath.
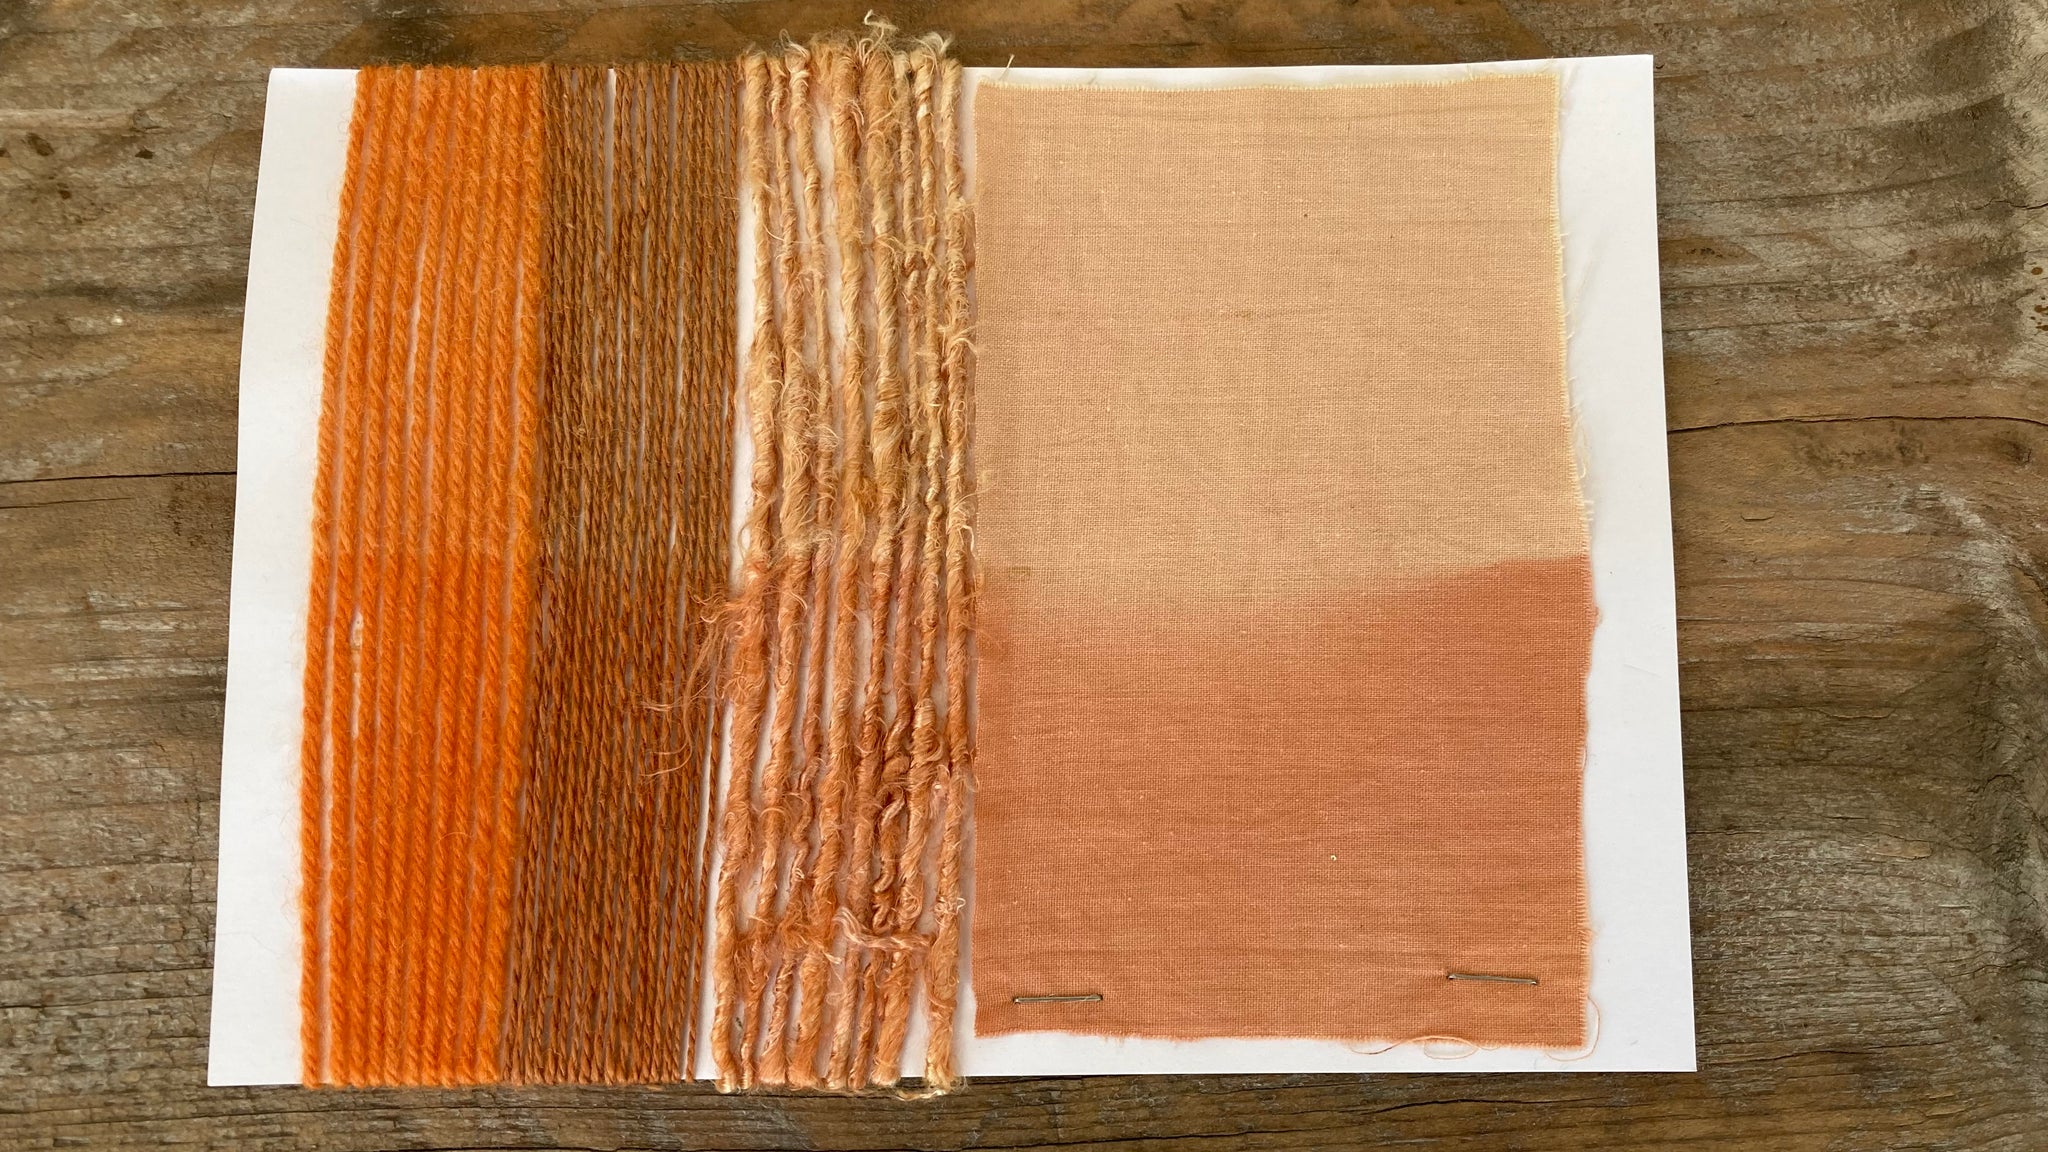
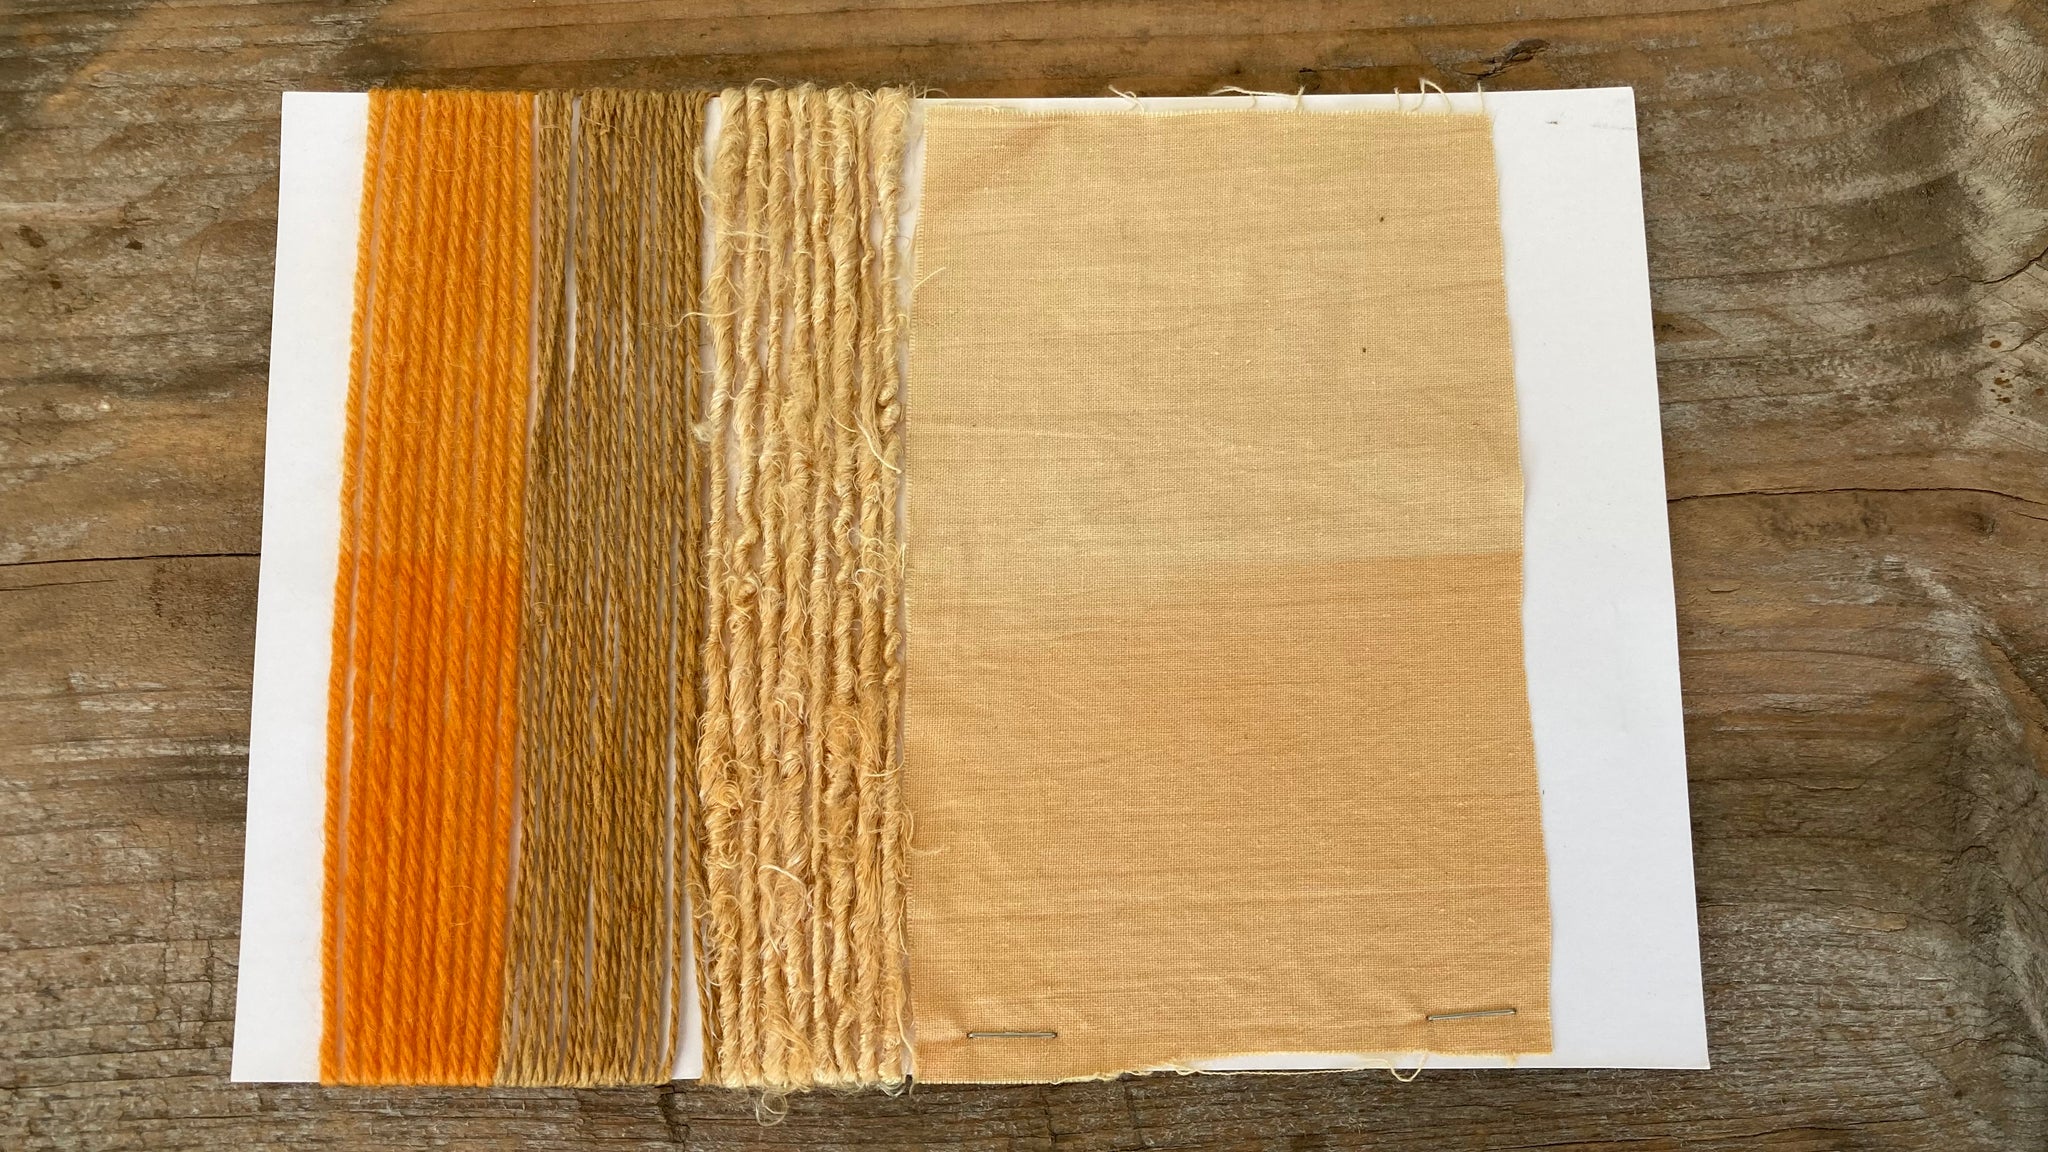
LIGHTFAST TESTS
These lightfast testers were left on a south-facing window sill for eight weeks; October and November. The bottom half of the card was covered up while the top half was left exposed to the light. The wool and linen samples from the 1st dye bath have held their colour well compared to the cotton sample. The banana yarn falls somewhere in between. On the 2nd (exhaust) dye bath tester the colour contrasts as less obvious with the paler colours.
Coreopsis - 1st dye bath
Coreopsis - 2nd (exhaust) dye bath
You can watch our YouTube video 'Naturally Dyeing with Dyer's Coreopsis' HERE 🌼
References:
Boutrup and Ellis (2018) The Art and Science of Natural Dyes