
NATURAL DYEING WITH COMFREY (Symphytum officinale)

Final dye results
Having used comfrey as one of the dyes on my recent workshop, with rather lack-luster results, I thought I’d give it another go. Within the time constraint of a one-day workshop it had not been possible either to steep the comfrey leaves overnight before brewing them in a dye bath, or to leave them to cool overnight before straining. Hopefully, including these two important stages of the natural dyeing process will produce livelier results. I’m also going to double the ratio of dyestuff to fibre from 100% to 200%.

Comfrey growing in a hedgerow
Comfrey is a widespread perennial shrub in the borage family, Boraginaceae, and very common in England. Its large, deep roots make it rich in nitrogen, phosphorus and potassium and it’s well known to gardeners for promoting plant growth. Steeping the leaves in rainwater for a couple of weeks produces a potent natural liquid plant feed, and its large hairy and somewhat prickly leaves are a deterrent to slugs.
Symphytum officinale favours damp conditions and is often to be found near hedgerows and ditches. Growing up to a metre tall it is easily identified late May to July by its clusters of drooping tubular flowers, ranging in colour from purple to pink to creamy white, which are particularly attractive to bees and hoverflies.
Comfrey has been cultivated as a medicinal herb for at least two thousand years and is best known to promote the healing of wounds and broken bones, as its folk names ‘woundwort’ and ‘knitbone’ suggest. The latin name ‘Symphytum’ originates from the Greek ‘symphis’ meaning growing together and ‘phyton’ meaning plant. Comfrey produces the chemical ‘allantoin’ known to stimulate cell production. It was historically applied in the form of a poultice made from the leaves, or as an ointment and allantoin is still used today in many cosmetics and lotions.
‘Culpeper’s Complete Herbal’ (1652) recommends a decoction to be drunk to ‘helpeth all inward hurts’, and comfrey tablets were reportedly standard issue in World War II first aid packs. But the modern understanding is that the comfrey plant contains toxic substances that can cause severe liver damage and so should only be applied locally, not ingested. Comfrey tea is not recommended!

Basket of comfrey leaves
Comfrey leaves can be foraged for dyeing throughout the summer, and I didn’t have to go far to gather a basketful. I wanted enough leaves to dye my fibres at 200% WOF (weight of fibre). So as I planned to dye 100g of fibres I needed 200g of comfrey leaves, which I then left outside for a couple of hours to give the insect life a chance to depart.

Fibres before dyeing
- For this dyeing session I used three plant (cellulose) fibres: a skein of natural linen, a skein of banana yarn and a square of cotton fabric. I also included a skein of wool, an animal (protein) fibre.
- All the fibres had been mordanted as necessary (see elkatextiles.co.uk) and wetted out (soaked well) before dyeing.
- I usually dye plant and animal fibres separately, as the latter is more fragile and needs gentle handling, but on this occasion I added them all to the dye pot together.
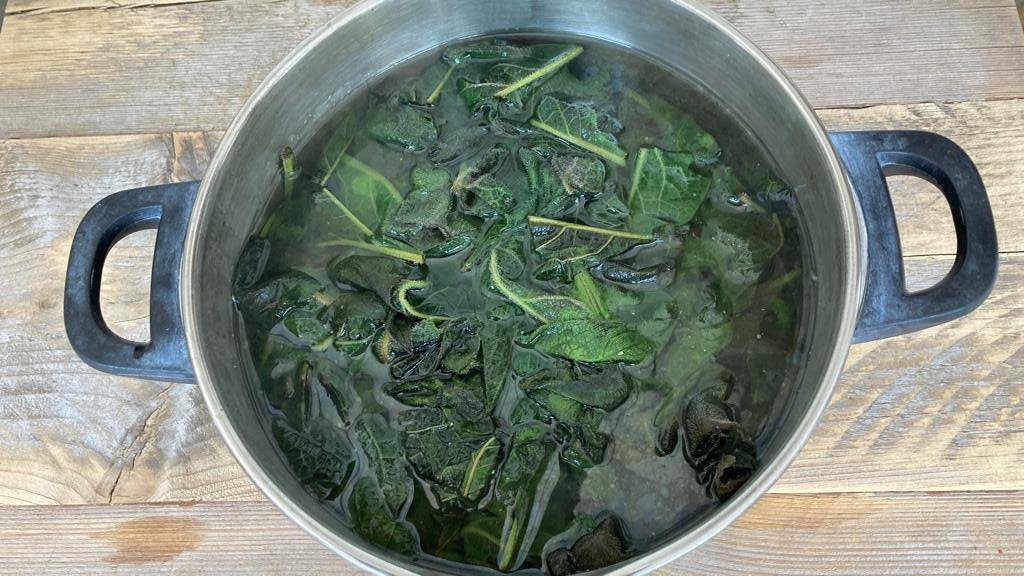
Comfrey leaves soaking
The comfrey leaves were roughly chopped and added to the dye pot. A couple of kettles of boiled water were poured over the leaves that were then left to steep overnight.

Dye pot on hob
The next morning the now softened leaves had already imparted some colour to the water and the dye bath was heated to 80C, a gentle simmer, and held at that heat for about an hour. A thermometer is helpful, but if you haven’t got one just keep an eye on the dye bath and reduce the heat as soon as the first small bubbles begin to rise to the surface.
Overheating natural dyes tends to dull the colours. I used an electric hob and removed the dye pot to a heatproof mat from time to time to regulate the temperature. A gas hob is much easier to control.
Once the dye bath had brewed for an hour it was removed from the heat and left to cool and steep overnight.

Straining the dye bath
The next day the contents were strained through a muslin-lined sieve and given a good squeeze to get the most out of the leaves which then went onto the compost.

Skeins going into the dye bath
When entering fibres into a natural dye bath it’s important to put them all in at once. If you add some fibres, and then some more, you may find that the first lot of fibres entered have taken up more than their fair share of dye particles, and the fibres entered a short time later will be paler.

Cotton square going into dye bath
It is easier to get even dye results on yarns than it is on pieces of fabric, which tend to fold over on themselves. The folds and creases dye unevenly (see blog Natural Dyeing With Nettles) so when entering fabric into a dye bath try and minimize these. With larger pieces of fabric it will be necessary to keep working the fabric around in the dye bath, and lifting it in and out to make sure the dye is reaching all surfaces evenly.

Dyed fibres hanging to dry
Once the fibres have brewed for an hour, allow them to cool in the dye bath and then hang them to dry. It’s a good idea to allow the newly dyed fibres time to ‘cure’ before washing them, to avoid losing too much colour.

Weighing iron (ferrous sulphate)
I prepared a double lot of fibres so I could ‘modify’ one lot with iron, which will always deepen or ‘sadden’ the tone of natural dyes. ‘Modifying’ fibres is a way of extending the colour range of a dye bath and this can be done using various solutions (see elkatextiles.co.uk) but iron is the most commonly used by natural dyers.
Iron stains everything so you need separate pots and utensils to create an iron modifying bath. You can with make your own iron water (ferrous acetate) with a mixture of water, vinegar and some rusty pieces of metal (see elkatextiles.co.uk) or from craft suppliers you can buy some ferrous sulphate, which I’m using here.

Iron bath
To make an effective iron modifying bath you only need a pinch of ferrous sulphate, dissolved well in warm water, and added to enough water to allow the fibres to move freely. 1% WOF is a good gauge. Iron can be damaging to fibres, particularly animal fibres such as wool, so don’t leave them in the iron bath for long. Modifying with iron improves the colourfast quality of natural dyes, and iron can also be used as a mordant, before dyeing.

Fibres drying; modified and non-modified
Fibres will change colour quickly in an iron modifying bath, so keep an eye on the process and remove the fibres as soon as you have the colour you want – allowing for the fact that they will darken a little more after removing from the iron bath. They should then be rinsed well and hung to dry before the final wash.
 Washing the fibres
Once the dyed fibres have dried (or almost) it’s important to wash them well in a pH neutral detergent, making sure not to agitate wool which can easily become matted.
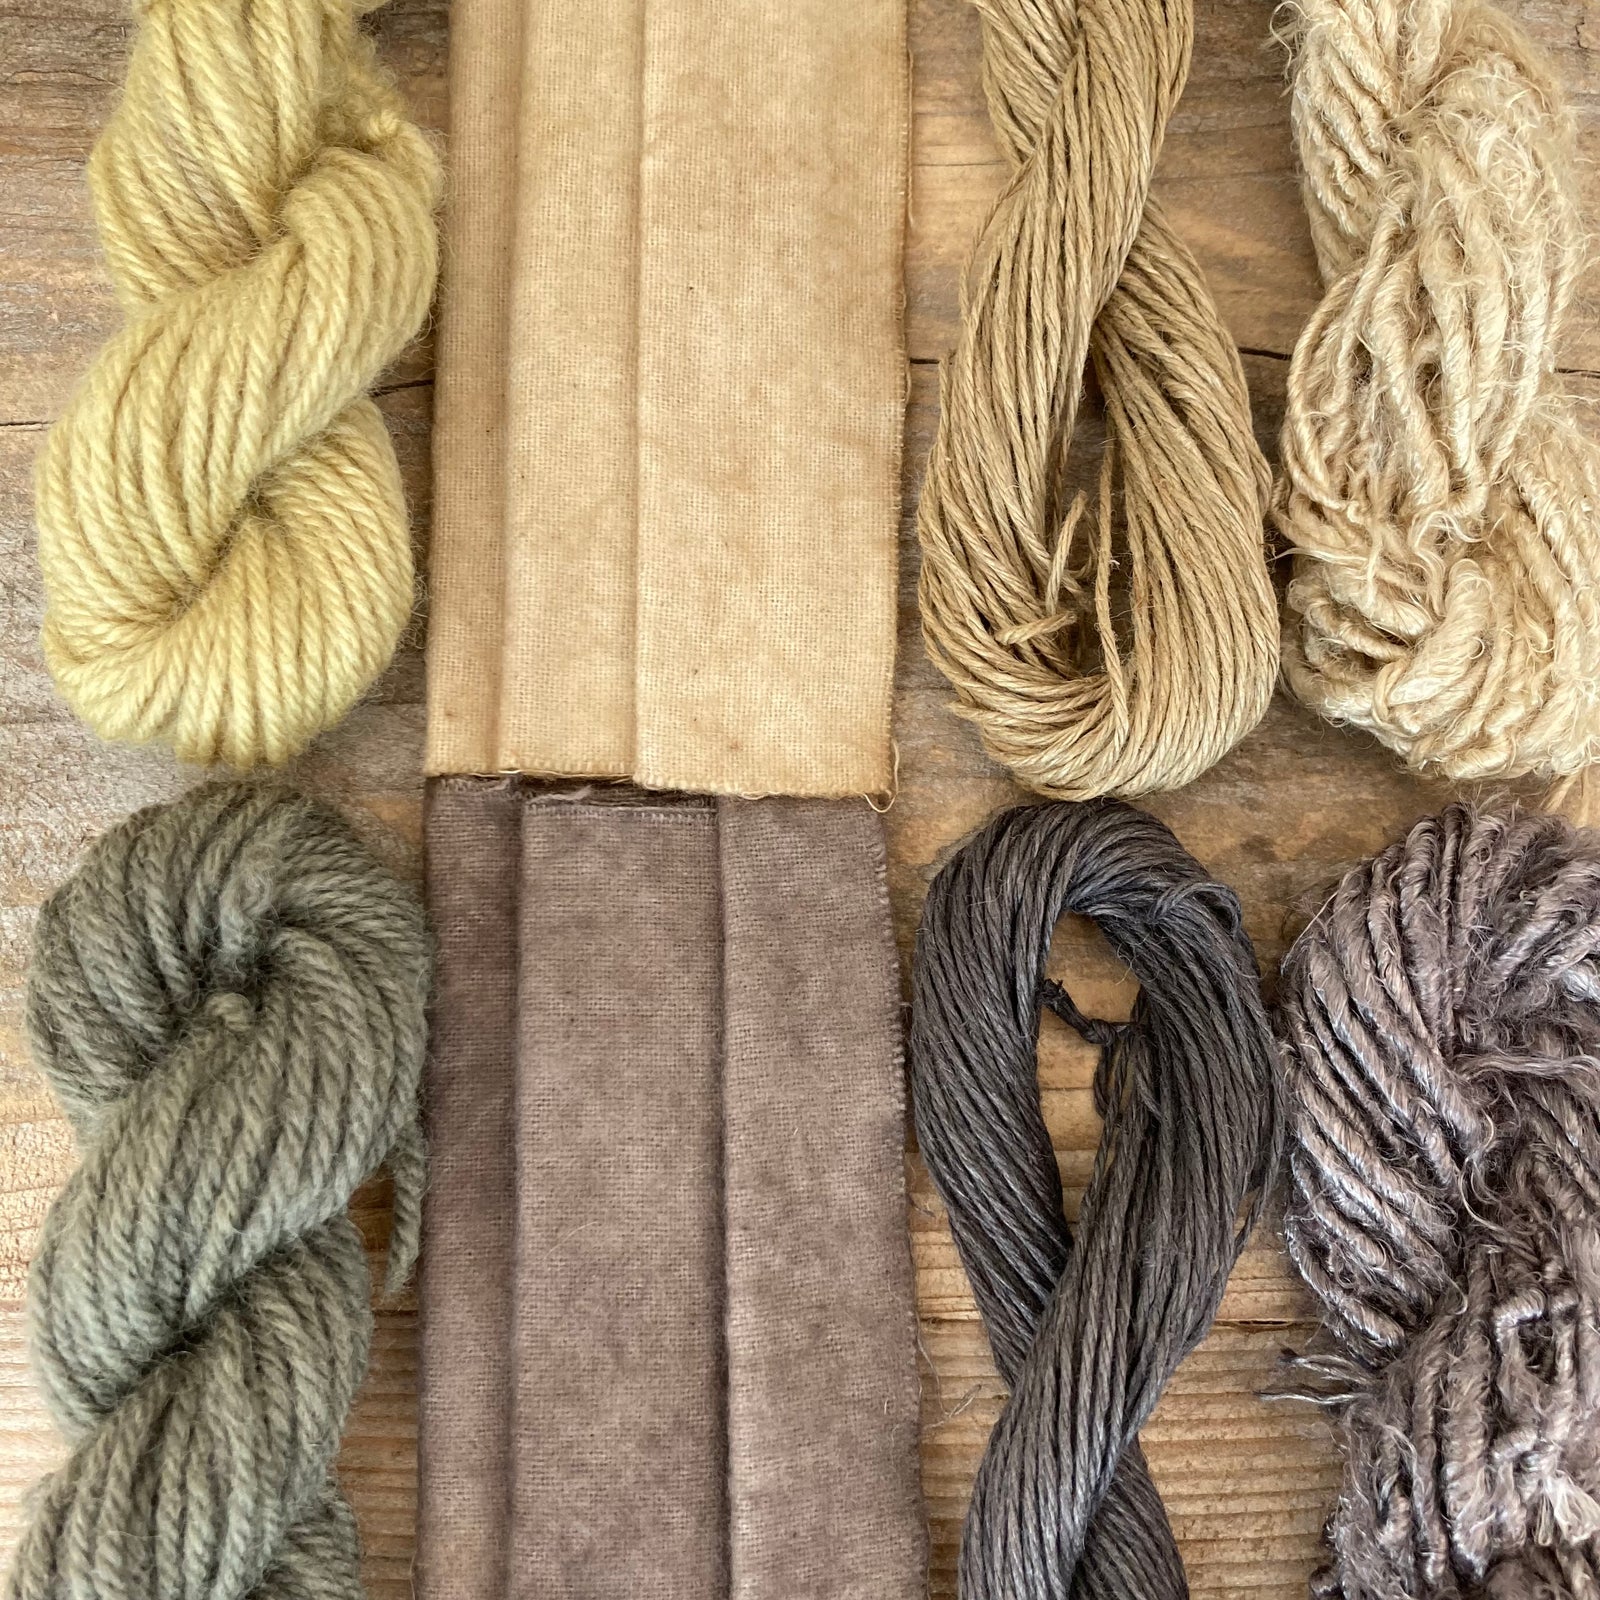
Final results
TAKE AWAYS:
- Using 200% WOF certainly produced a bolder result than the samples we dyed on the workshop, at 100% WOF. Steeping the comfrey leaves overnight both before and after heating them will also have drawn out more colour.
- Including comfrey flower heads in the dye bath might result in greener tones, but they were past their best when I gathered the leaves, so that’s one to try next year.
- The iron modified samples are dramatically different, giving browns on the plant fibres and a soft sage green on the wool.
- Natural dye results will always be several shades lighter once the fibres have dried, but comfrey seems to hold its colour well, so can be considered relatively washfast.

As always with natural dyes, the range of colours harmonize happily.
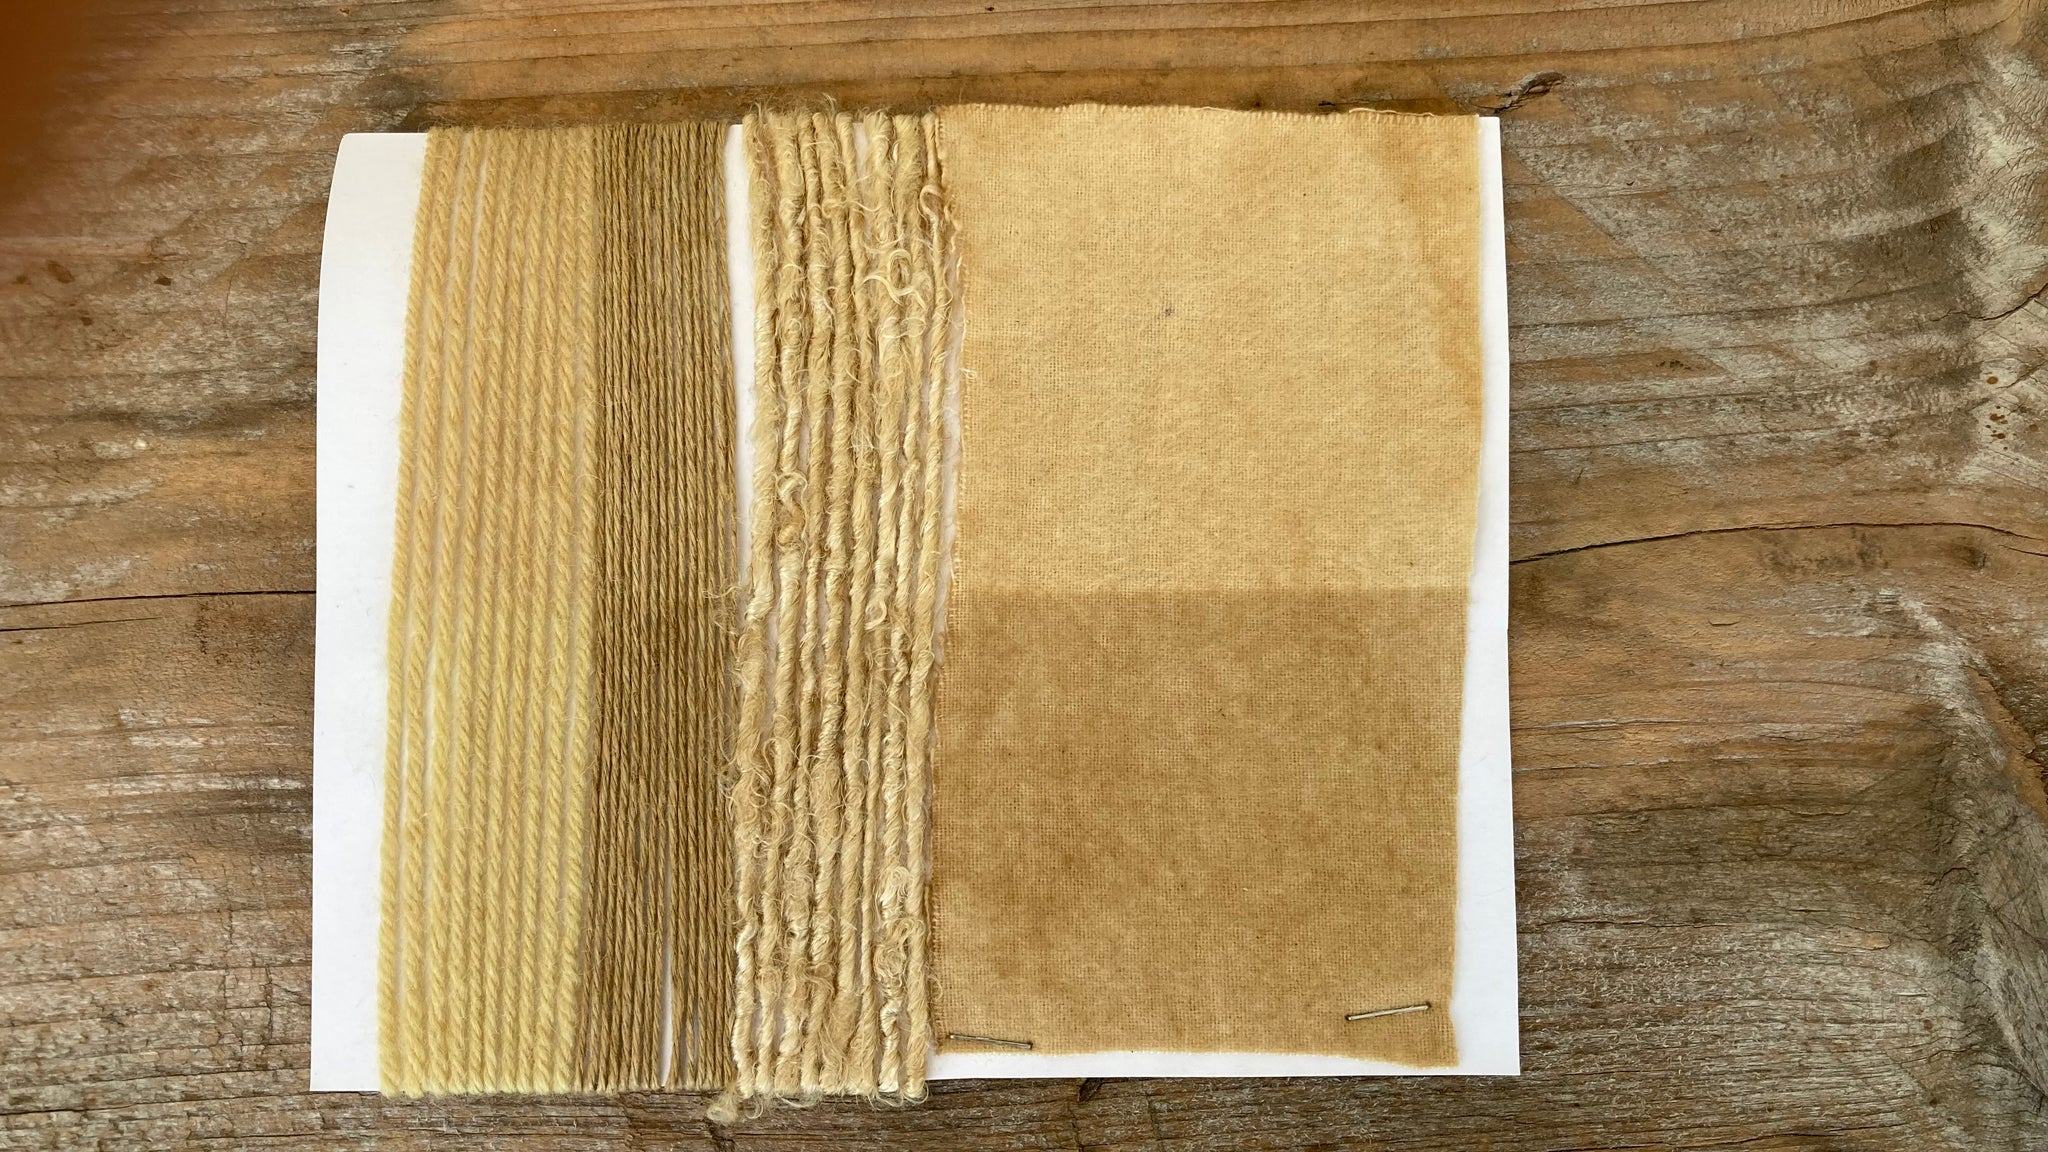
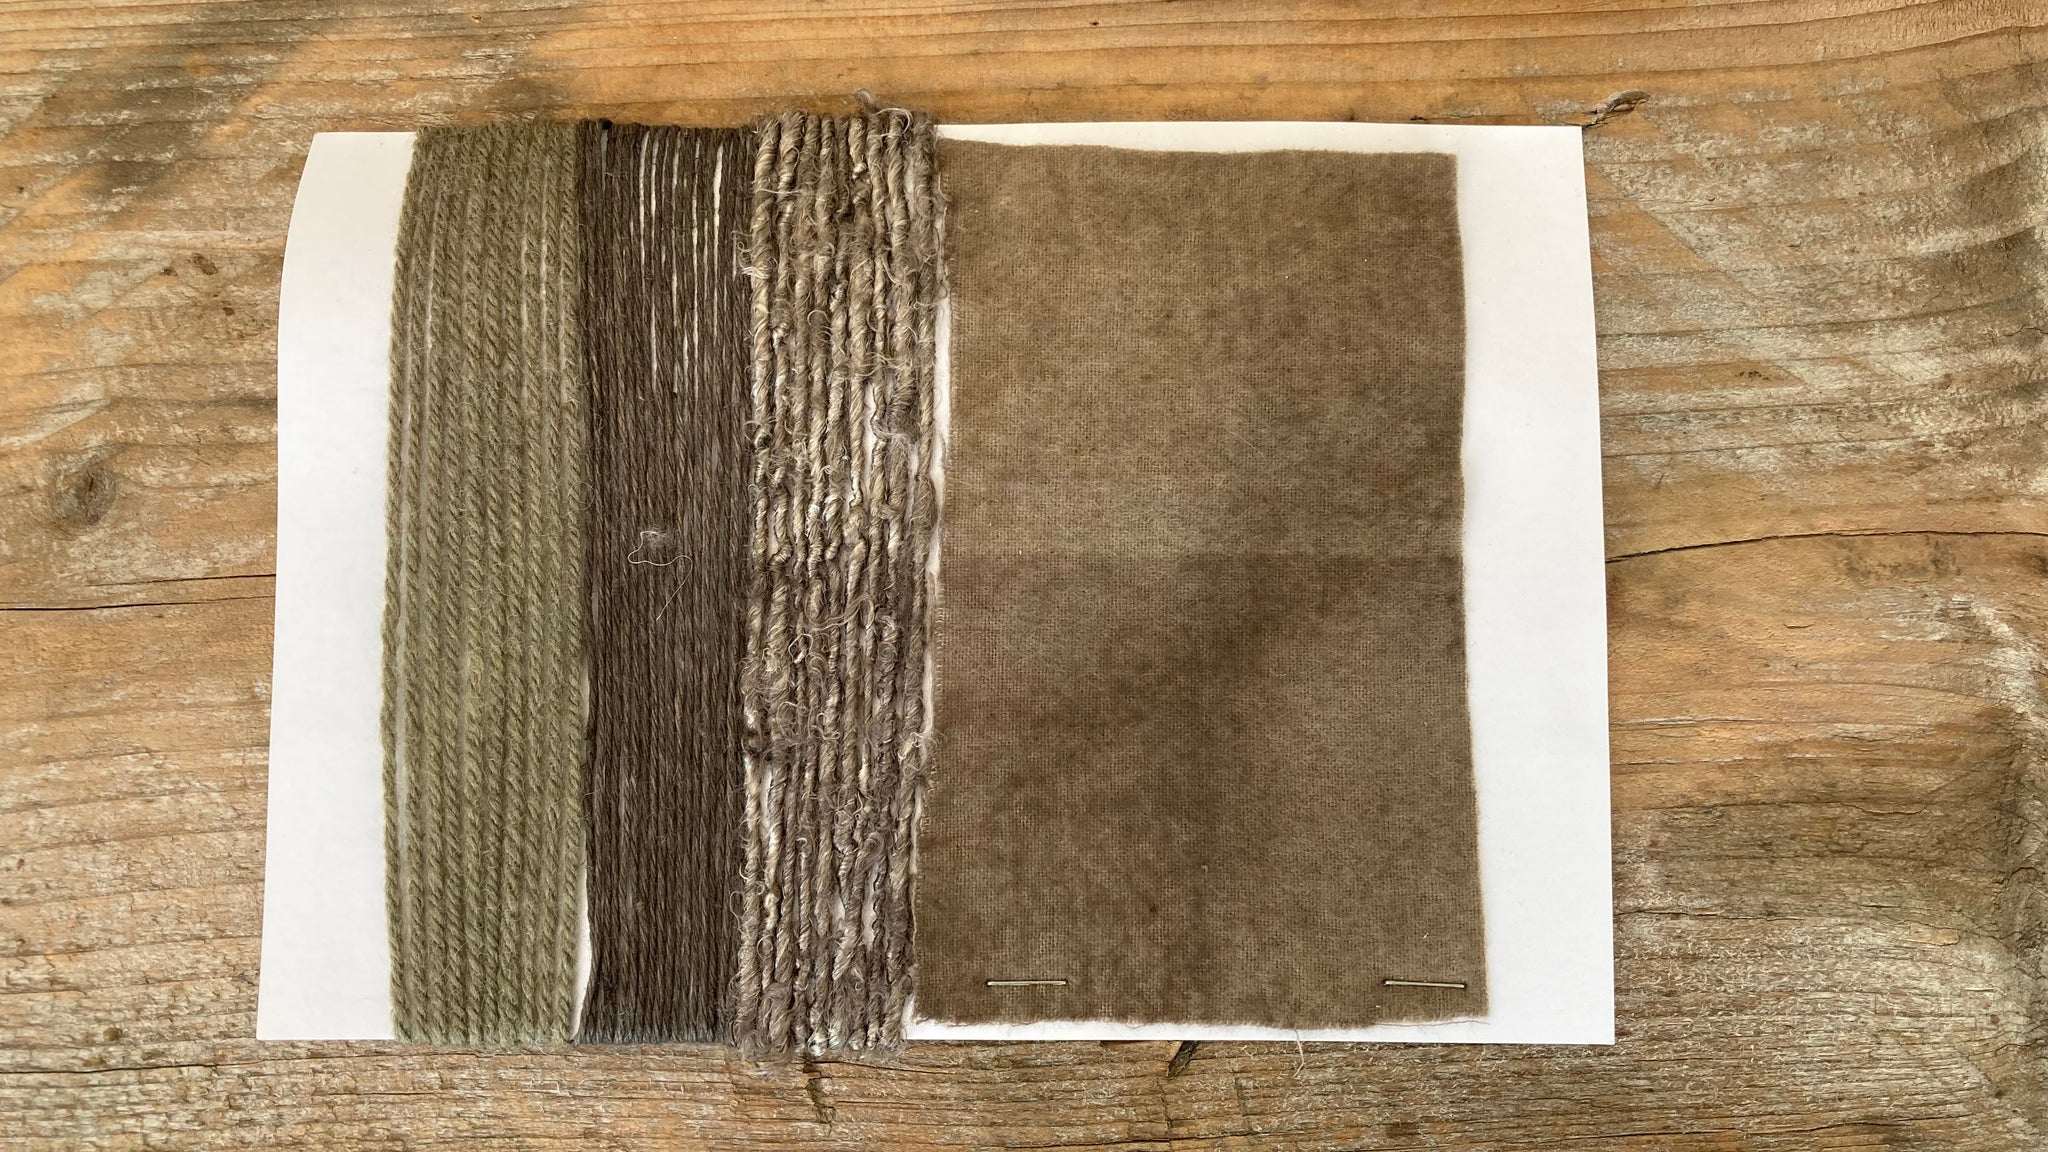
LIGHTFAST TESTING
These two lightfast testers were left on a south-facing window sill for eight weeks; October and November. The bottom half of the card was covered up while the top half was left exposed to the light. The most striking loss of colour is in the cotton fabric, but once this had been modified with iron the colour held much better. I love the chocolate browns and the grey/green of the modified samples.
References:
completeherbal.com